Audio Visual
A step by step guide to display your laptop’s video and audio feed to the Halls built in AV system
Stage Location
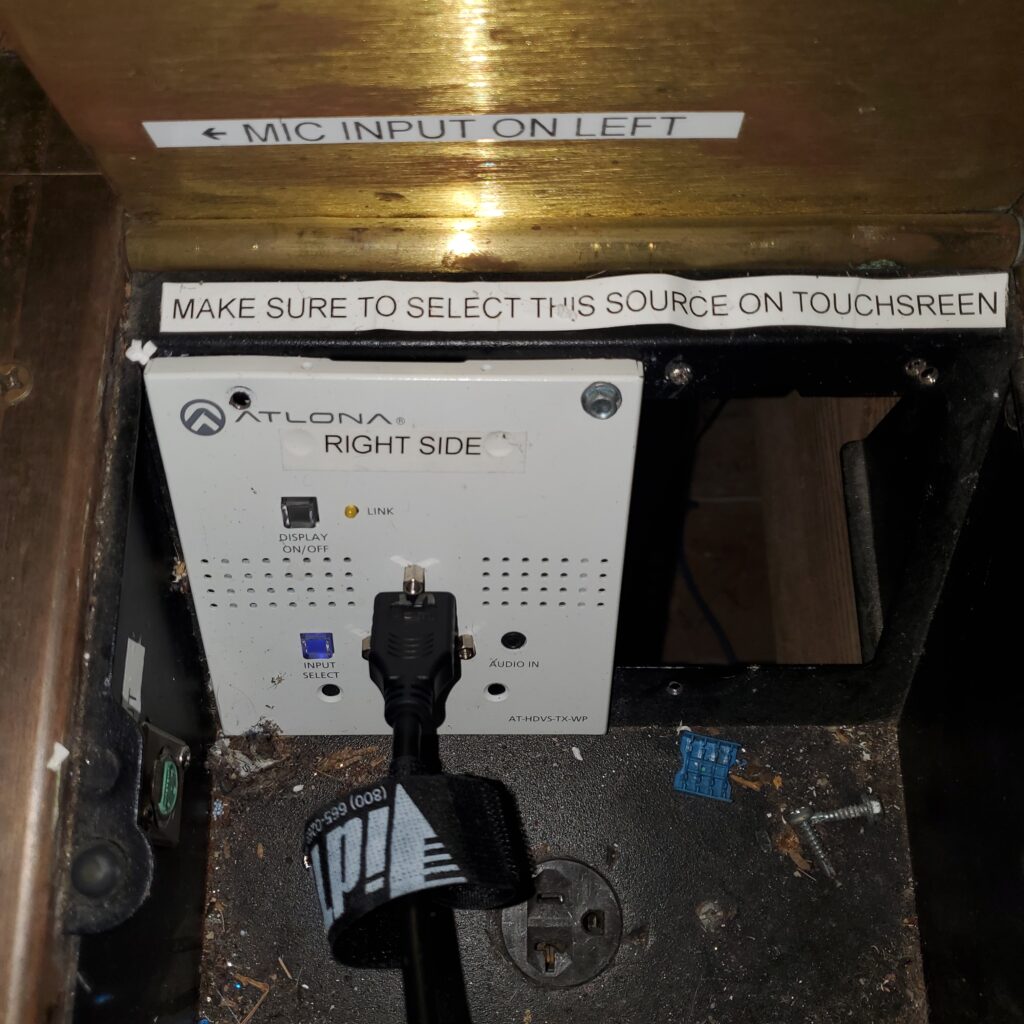
First step is to choose the location your laptop will be plugged into. These are found inside the brass floor panels
- Center Floor Box: middle of the stage input (Podium)
- Right Floor Box: far side stage floor panel
You will need an HDMI cable and possibly adapter (usually USB-C) to make this connection. Here is a visual on an HDMI cable plugged in underneath the brass panel

AV Wall Panel
Choose the input panel locations on stage where your laptop is plugged into. When pressed the selected option will be highlighted in blue
- Center Floor Box: middle of the stage input (Podium)
- Right Floor Box: far side stage floor panel

Projection Screens
Referencing the image above, There are 3 options to control the screens
- All On: Drop all 4 screens
- Front Projectors: Drop 2 front screens closest to the stage
- Individual Projectors: Open a pop up screen to choose from each of 4 screens
Audio Volume Control
You should be able to control music/audio from the laptop, but in case you need to adjust a boost in volume tap the ▲ ▼ to raise and lower the white meter.

Apple Macbook
Control of your laptop’s volume output maybe disabled after connecting to our AV system. This is “Apple’s way” of simplifying audio. In this case, my advice is to use the volume slider in the video player/app
Lighting
Stage and floor lighting can be controlled with preset senes. Scene 2 is the most useful scene for most events.
If you need more fine grain control of the lighting, please ask maintenance to adjust.
