AV Walkthrough
Countryside Banquets works with you on all questions leading up to and during your event. If you would like to set up a phone call, in person meeting, or contact us by email please do so at [email protected]

Please Note: Staff is available on an on appointment basis. We require 48hr advance notice to meet at this location.
Projectors
#todo insert wide shot of 2 projectors rolled down
2 roll up screens are built into the ceiling. They are staggered in position as to cover the front and back of the room.
- Adjacent to the left side of the stage
- halfway between stage and back of the room
Follow the Back Right side of the stage and you will find the AV controls just inside the hallway
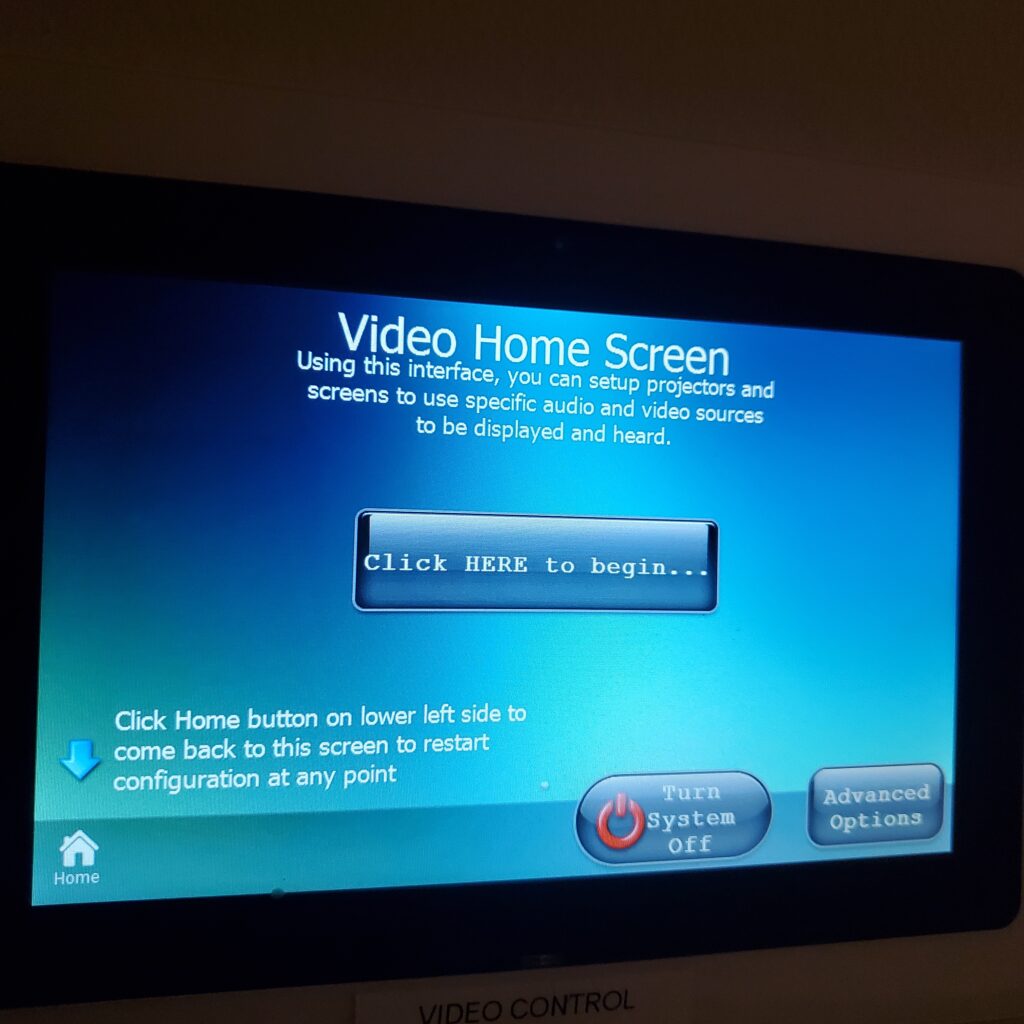
[!note] If the Screen is Black
If the screen is dark and not waking up to touch, ask a maintenance worker to turn on the AV rack in our utility closet
After clicking Click HERE to begin... you’ll reach
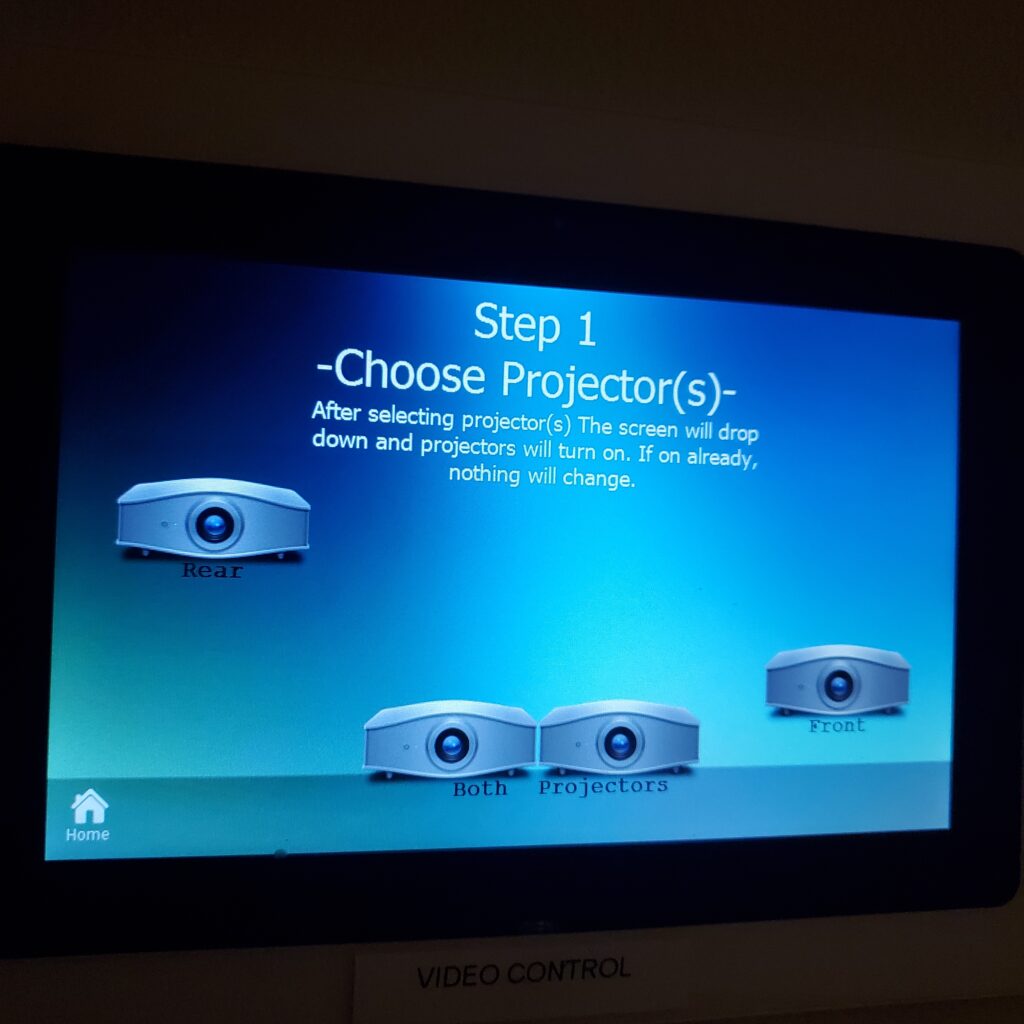
Step 1
Choose by tapping the projector image that you will use
- Rear projector only
- Both projectors together
- Front projector only
This will remotely roll down the screens and turn on the projectors chosen.
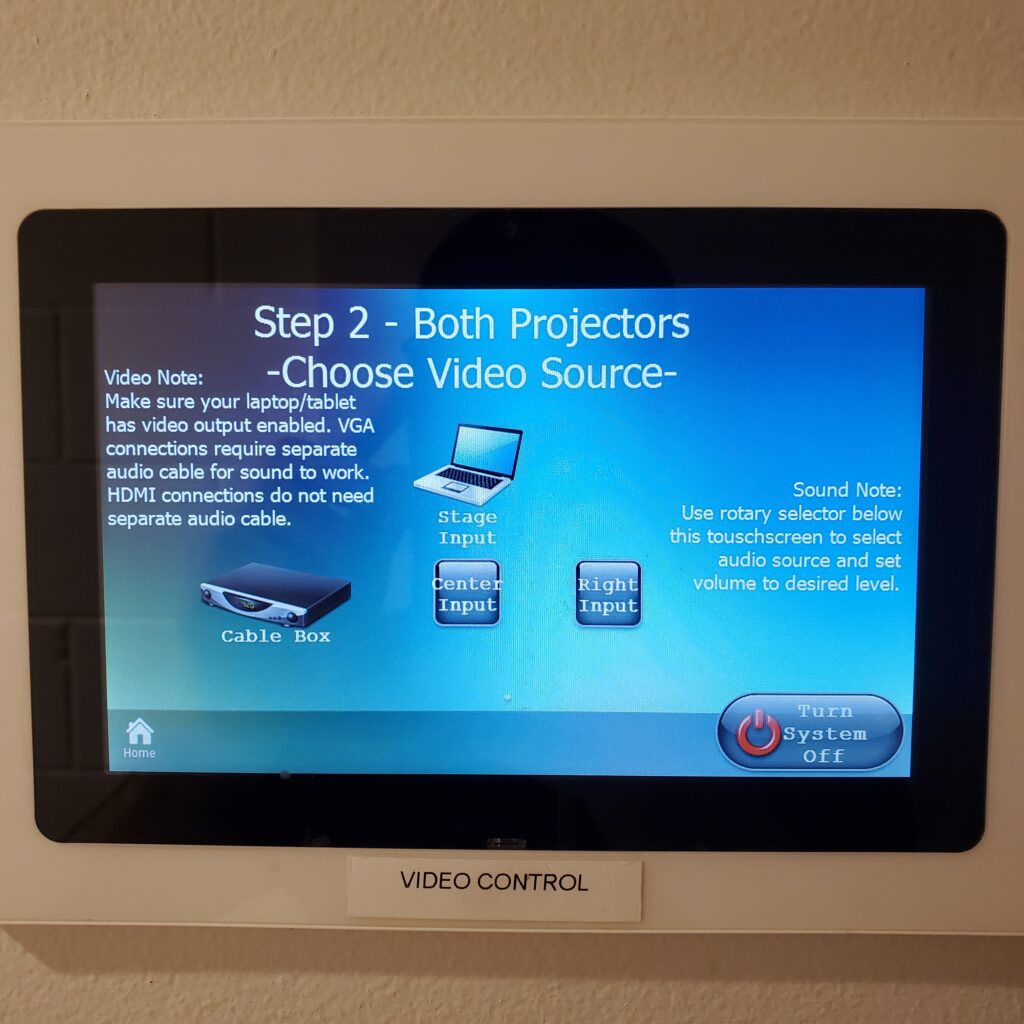
Step 2
Choose the location on the stage you are plugging in your input cable
[!warning] Center Input
As of now, only the center input is available. DO NOT use theRight Input.
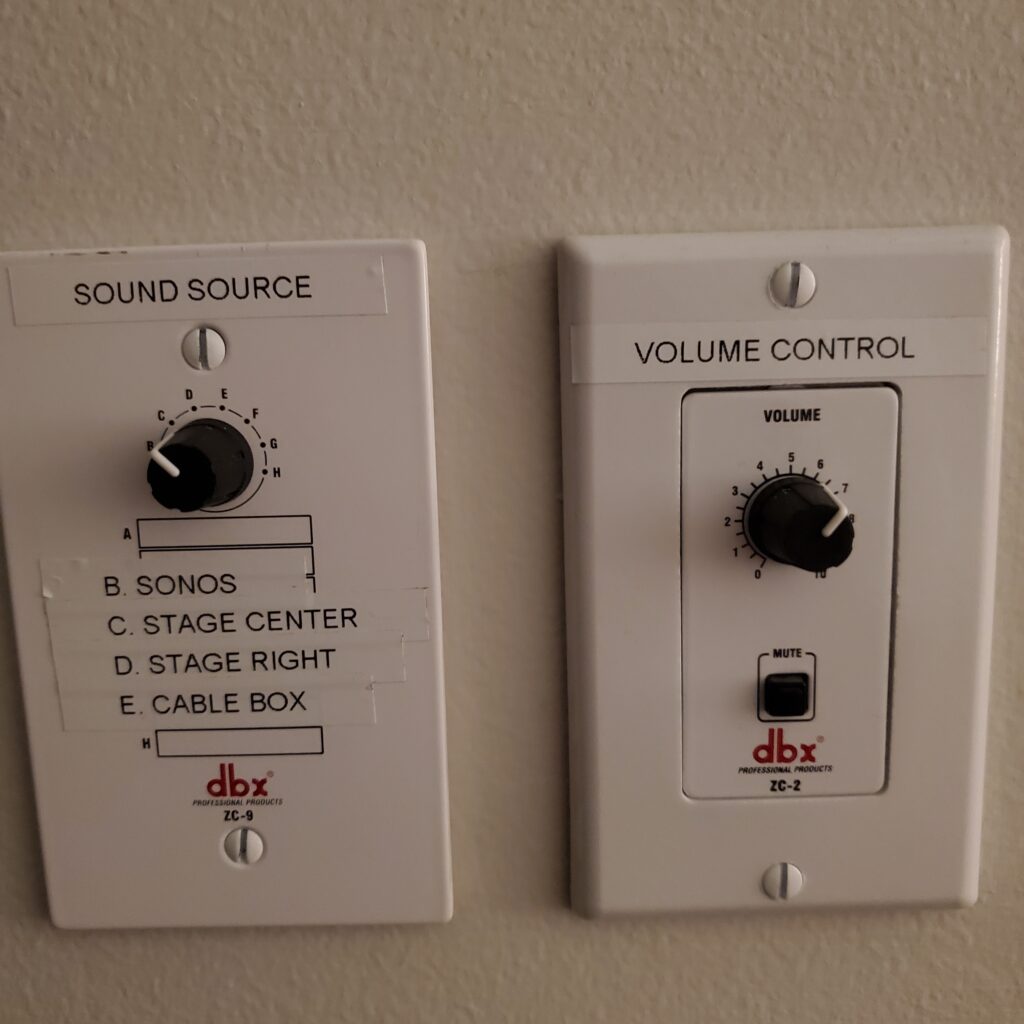
Audio Settings
settings for audio (for the most part) should not change. For most events have
Sound Sourceset toCVolume Controlset to around6
Video Input
Moving to the stage, you will see a brass plate cut into the stage (it’s possible the podium is rolled over top this plate). Lift the plate to find the video inputs.
[!tip] HDMI Cable
If you need an HDMI cable, you will find one inside the podium’s cabinet.
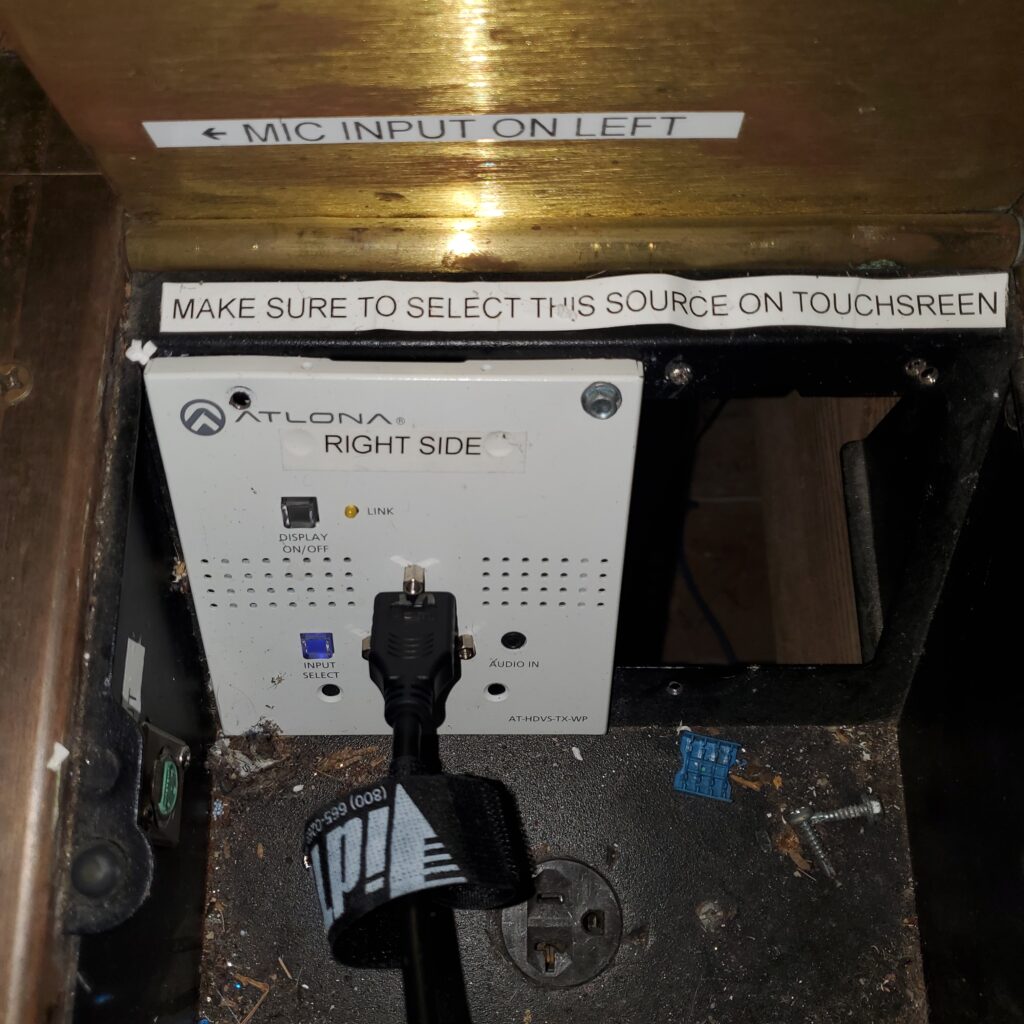
[!note] Center Input
Note to self: RemoveRight Sidepanel label as this is actually theCenter input
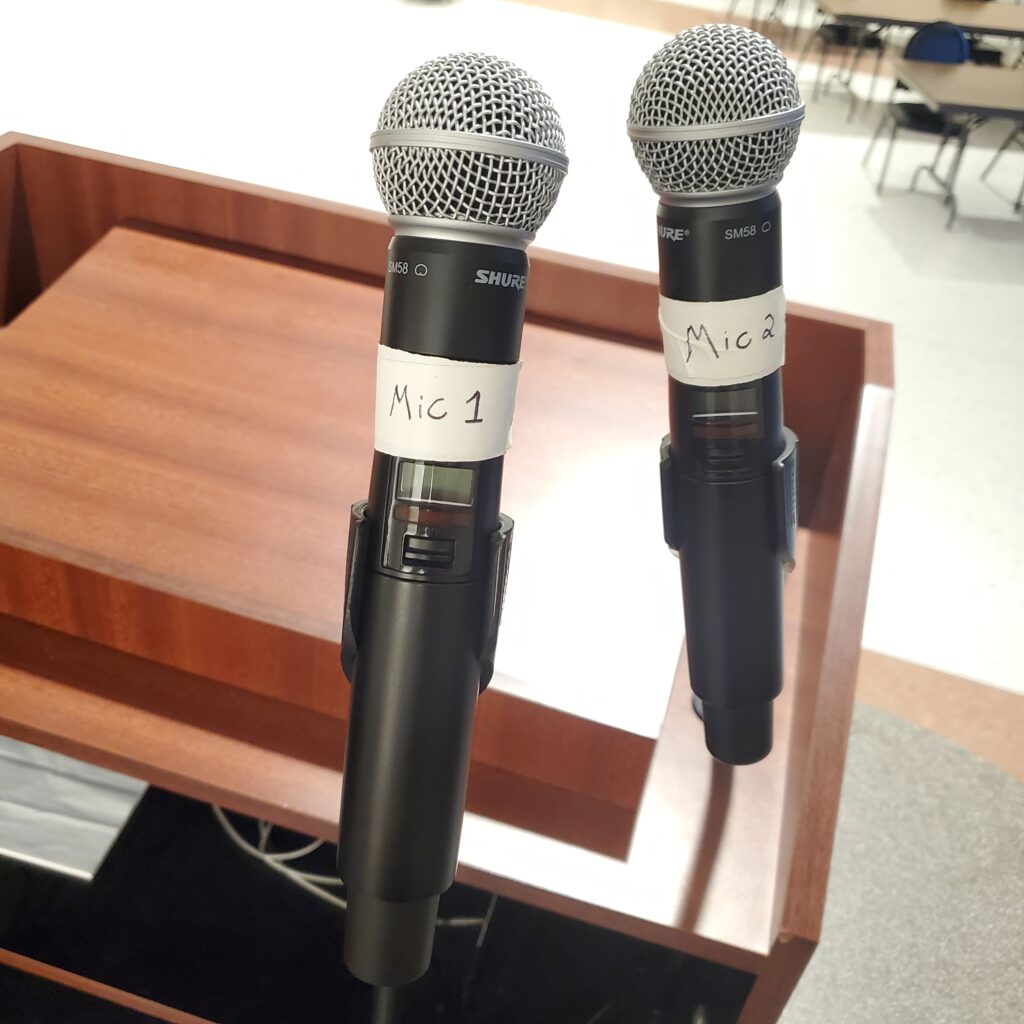
Microphones
There are 2 wireless handheld microphones at our Lakemoor location. You may mount them in either of 2 locations
- Goose neck clip built into the podium
- Straight Mic stand
Turn on the Microphones by flipping the toggle switch (wait 10 seconds) and you’re ready to rock. ==Please turn microphone off when not in use==
[!tip] Batteries
If batteries are low or dead, as staff for a fresh pair

Lighting
Dim, brighten, and control lighting through out the hall with the white/blue square touch screen. (you may need to tap this panel to move pass the splash screen)
[!note] Preset Scenes
Each button “All ON”, “AV Mode”, “Meeting”, etc… are preset scenes that change stage, floor, or all lights (fluorescent, recessed cans, spotlights, etc). Try out each scene to decide which presets work for you.
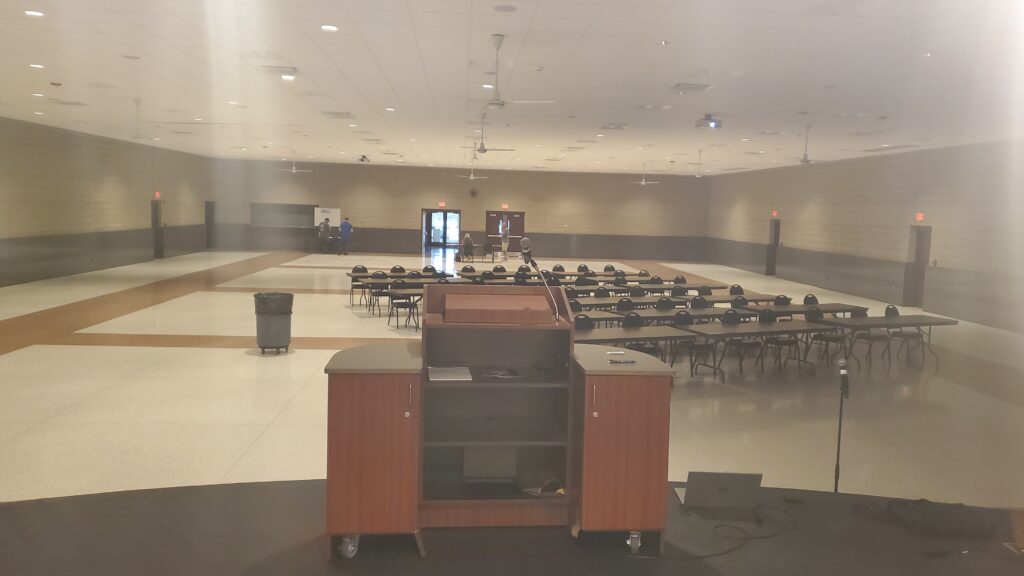
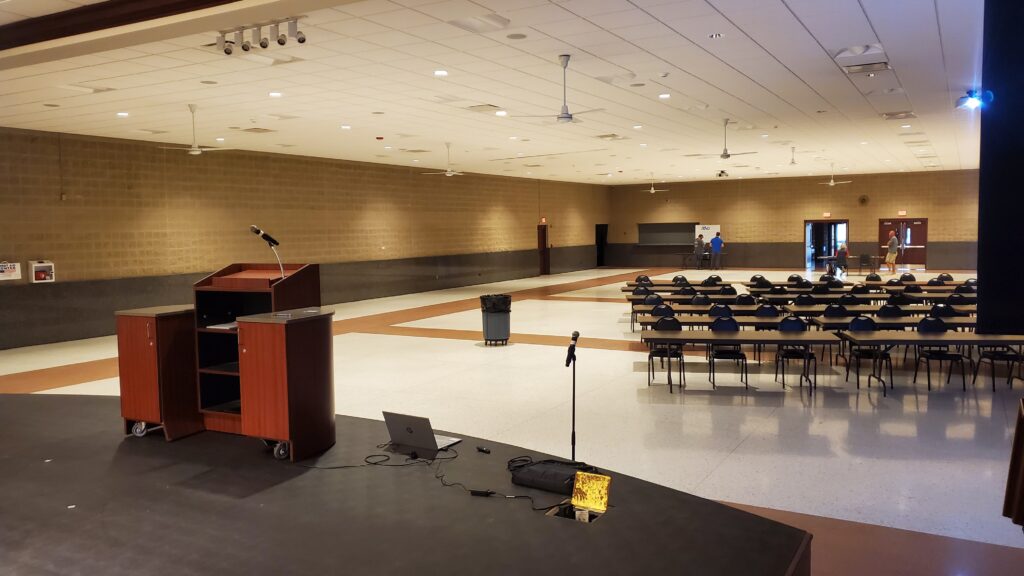
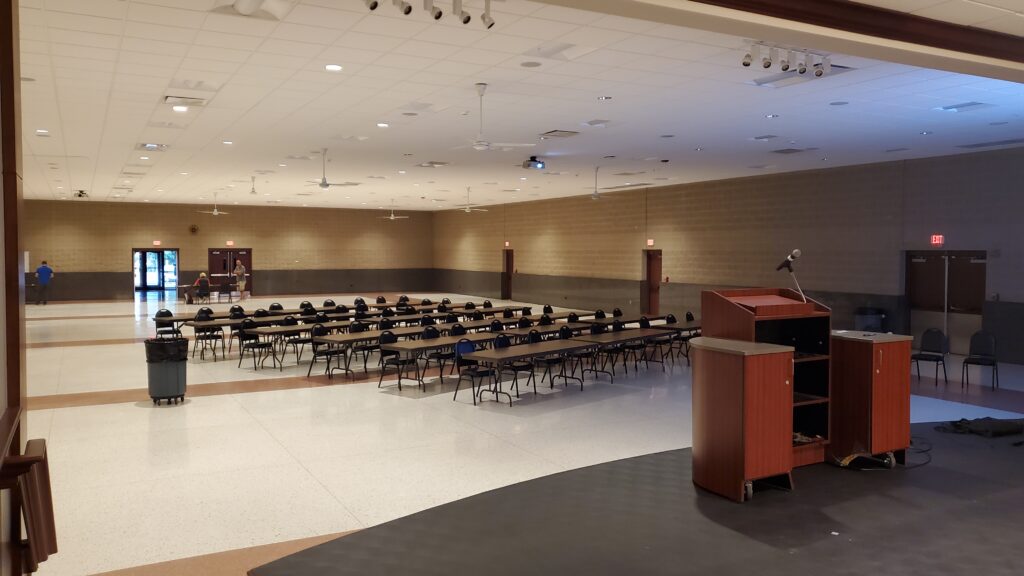
The Space
Here are additional photos that shows off the space